概述 什么是 SpringBoot-Starter Spring Boot Starter 是 Spring Boot 框架中的一个重要概念,它是一种用于简化项目配置和依赖管理的方式。在 Spring Boot 中,应用程序通常需要引入许多依赖库和配置,以实现特定的功能或集成特定的技术栈。Spring Boot Starter 通过预定义的依赖和配置来简化这个过程,让开发人员能够更轻松地搭建和配置应用程序。
为什么要自定义 Starter
模块化和复用性: 自定义 Starter 允许你将通用功能封装为可重用的模块。这可以使你在多个项目中轻松地使用相同的功能,减少重复代码的编写。
内部标准化: 如果你的组织内部有一些通用的技术选型、配置和最佳实践,你可以创建自定义 Starter 来强制执行这些标准,从而提高代码的一致性和可维护性。
简化团队开发: 自定义 Starter 可以帮助团队成员更容易地使用相同的技术栈和配置,减少了新成员加入或跨项目切换时的学习曲线。
定制化需求: 你可以根据项目的特定需求创建自定义 Starter,将其与通用功能集成,从而更好地满足项目的独特要求。
隐藏复杂性: 如果你的项目需要集成多个组件或依赖项,你可以通过自定义 Starter 来隐藏底层的复杂性,提供一个更简洁的界面供开发人员使用。
提高开发效率: 自定义 Starter 可以减少项目配置的工作量,使开发人员能够更快速地启动和开发应用程序。
促进规范: 自定义 Starter 可以推动项目内部遵循特定的架构、模式和规范,从而促进代码质量和一致性。
对外开放: 如果你的项目提供一些可扩展的功能或插件,你可以将其封装为自定义 Starter,方便其他开发人员在他们的项目中使用。
命名规范
自动装配原理
Spring Boot 会扫描类路径下的META-INF/spring.factories文件,这个文件列出了可用的自动配置类。
配置类通过条件注解来判断这个配置类是否生效,如果生效,就会自动配置。例如:@ConditionalOnClass注解表示当类路径下有指定的类时,配置类才会生效。
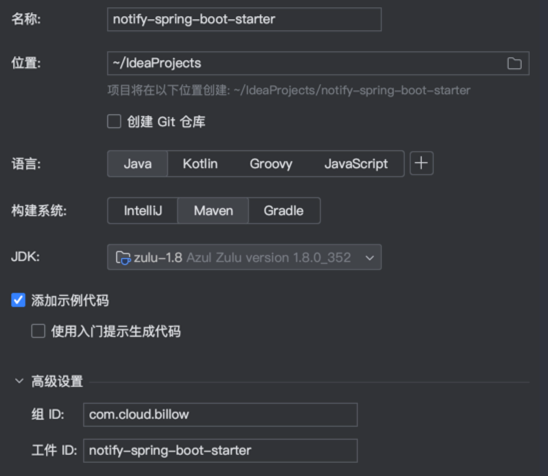
如何自定义Starter 创建 Maven 项目 新建一个空的 Maven 项目:
Spring Boot Starter 项目无需启动类,且通常不包含任何代码,只包含一些依赖和配置。
添加依赖 1 2 3 4 5 6 7 8 9 10 11 12 13 14 15 16 17 18 19 20 21 22 23 24 25 26 27 28 29 30 31 32 33 34 35 36 37 38 39 40 41 42 43 44 45 46 47 48 <?xml version="1.0" encoding="UTF-8" ?> <project xmlns ="http://maven.apache.org/POM/4.0.0" xmlns:xsi ="http://www.w3.org/2001/XMLSchema-instance" xsi:schemaLocation ="http://maven.apache.org/POM/4.0.0 http://maven.apache.org/xsd/maven-4.0.0.xsd" > <modelVersion > 4.0.0</modelVersion > <parent > <groupId > org.springframework.boot</groupId > <artifactId > spring-boot-starter-parent</artifactId > <version > 2.7.14</version > <relativePath /> </parent > <groupId > com.cloud.billow</groupId > <artifactId > notify-spring-boot-starter</artifactId > <version > 1.0.0-SNAPSHOT</version > <properties > <maven.compiler.source > 8</maven.compiler.source > <maven.compiler.target > 8</maven.compiler.target > <project.build.sourceEncoding > UTF-8</project.build.sourceEncoding > </properties > <dependencies > <dependency > <groupId > org.springframework.boot</groupId > <artifactId > spring-boot-autoconfigure</artifactId > </dependency > <dependency > <groupId > org.springframework.boot</groupId > <artifactId > spring-boot-configuration-processor</artifactId > <optional > true</optional > </dependency > <dependency > <groupId > org.projectlombok</groupId > <artifactId > lombok</artifactId > <optional > true</optional > </dependency > </dependencies > </project >
编写配置类 1 2 3 4 5 6 7 8 9 10 11 12 13 14 15 16 17 18 19 20 21 22 23 24 @Data @EnableConfigurationProperties(NotifyProperties.class) @ConfigurationProperties(prefix = NotifyProperties.NOTIFY_PREFIX) public class NotifyProperties { public static final String NOTIFY_PREFIX = "notify" ; private String from; private String to; }
编写 Service 类 1 2 3 4 5 6 7 8 9 10 11 12 13 14 15 16 17 18 19 20 21 22 23 @Data public class WXNotifyService implements NotifyService { private NotifyProperties notifyProperties; @Override public boolean sendNotify (String content) { try { String from = notifyProperties.getFrom(); String to = notifyProperties.getTo(); System.out.println("from: " + from + ", to: " + to + ", content: " + content); } catch (Exception e) { return false ; } return true ; } }
编写自动配置类 1 2 3 4 5 6 7 8 9 10 11 12 13 14 15 16 17 18 19 20 21 22 23 24 25 26 27 28 29 30 @Configuration(proxyBeanMethods = false) @ConditionalOnClass(name = "com.cloud.billow.properties.NotifyProperties") @EnableConfigurationProperties(NotifyProperties.class) public class NotifyAutoConfiguration implements InitializingBean { private final NotifyProperties notifyProperties; public NotifyAutoConfiguration (NotifyProperties notifyProperties) { this .notifyProperties = notifyProperties; } @Bean @ConditionalOnMissingBean public NotifyService notifyService () { WXNotifyService wxNotifyService = new WXNotifyService (); wxNotifyService.setNotifyProperties(notifyProperties); return wxNotifyService; } @Override public void afterPropertiesSet () throws Exception { } }
编写 spring.factories 文件 在src/main/resources目录下创建META-INF/spring.factories文件,内容如下:
1
2
org.springframework.boot.autoconfigure.EnableAutoConfiguration =\ com.cloud.billow.configuration.NotifyAutoConfiguration
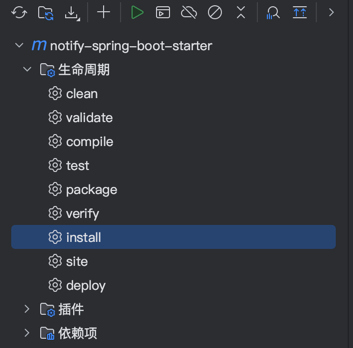
使用Maven打包
使用自定义 Starter 引入自定义 Starter 依赖:
1 2 3 4 5 <dependency > <groupId > com.cloud.billow</groupId > <artifactId > notify-spring-boot-starter</artifactId > <version > 1.0.0-SNAPSHOT</version > </dependency >
配置自定义 Starter:
1
2
3
notify: to: 小明 from: 小红
由于引入了configuration-processor依赖,所以在配置文件中输入notify前缀时,会有提示,如下图所示
使用自定义 Starter:
1
2
3
4
5
@GetMapping(value = "/test") public String test () { boolean isSuccess = notifyService.sendNotify("这个是消息的内容" ); return String.valueOf(isSuccess); }
输出


